Sep 272012
 

One of the most talked about features, for better or for worse, of iOS 6 is the new Maps – Apple’s first attempt at mapping the world. If you’re a curious user who would like to use this new Apple Maps on your (OS X) computer, without the need upgrade to the latest iOS release (or even own a compatible iPhone or iPod Touch), you can do so with the latest version of Xcode and the iOS SDK, which include the iOS Simulator

First, make sure that you have the latest version of Xcode installed by checking the OS X App Store for any updates. You can also install Xcode free of charge if needed.  Next, open it and load an existing iOS app project, or create a new one.

When you’ve done this, change the setting on the top left menu to “iPhone 6.0 Simulator”, and then press the “Run” button.

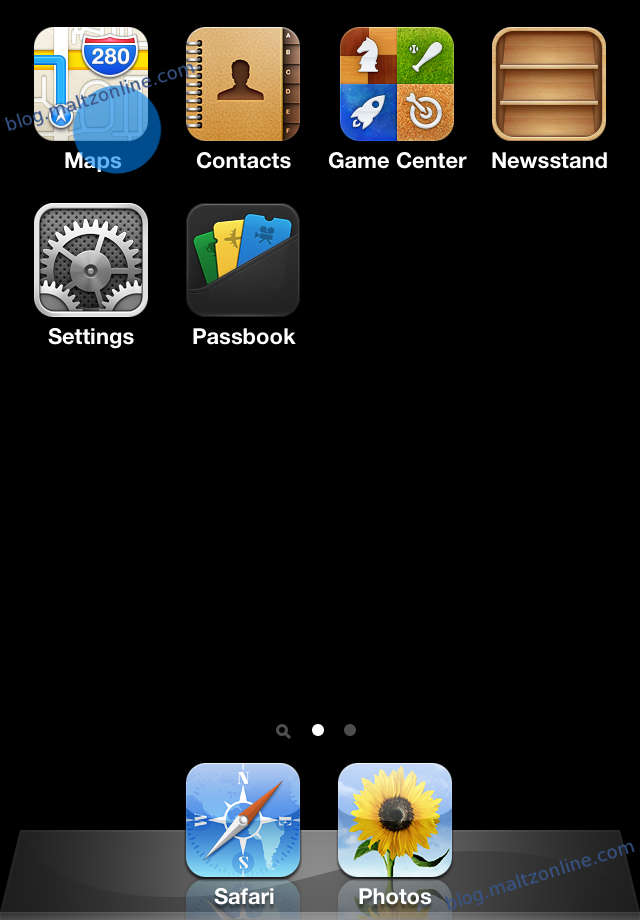
After the iOS Simulator starts running, with your app running in it, you can either press the Stop button pictured above, or simply press the Home button on the simulated iPhone, and navigate to the first home screen.  Here, you will see the Maps app, to click and run.

From here, you can experience Apple’s Maps using the standard controls.  Double click for “single-finger double-tap,” and hold option and click to pinch, rotate, or double-finger double–tap.

May 132012
 

A little-known feature of iOS 5 is the ability to create custom vibrations for incoming calls.  In this tutorial, I will show you how to enable custom vibrations, create them, and assign specific vibrations on a per-user basis, in the same way you can assign custom ringtones to specific users.

Enabling Custom Vibrations

First, we must enable the “Custom Vibrations” feature. To do this, load Settings.app, and tap on “General”

Next, scroll a bit, and tap “Accessibility”

Scroll down in the Accessibility screen, and tap the slider next to “Custom Vibrations”, ensuring that it is set to “ON”

Now, we have enabled the option.

Create a Custom Vibration

To create a custom vibration, return to the main screen in Settings.app, and tap on “Sounds”

Then, scroll to the bottom to reveal a “Vibration” option

This screen presents you with an option of standard vibrate alerts to choose from, and the option to create a new one.  Tap the bottom selection to begin

As the screen suggests, tapping on your screen will enable you to simulate a vibration.  The longer you keep your finger pressed to the screen, the longer the resulting vibration lasts.  You can also lift your finger and reapply it in order to create a pattern

When you have finished, press the “Stop” button at the bottom

You may now playback the vibration, to preview how it will feel.  If you are not satisfied with it, you can tap the “Record” button to start over.  If you are satisfied, then you should tap the “Save” button on the top-right

This presents you with a prompt to enter the name which refers to this sequence.  When you have finished entering a name, tap the “Save” button

Back in the “Vibration” menu, you can now select your new vibration as the default

Note that if you’re interested in deleting a custom vibration, the typical swipe-to-delete feature works in this menu as well

Assigning a Custom Vibration on a Per-User Basis

To assign a specific vibration to a user, open that user’s entry in the Address Book or Phone app, and tap the edit button

Then, scroll a bit, and tap on “Vibration”


And in the resulting menu, set the vibration to your choosing (the default option will be the option selected above)

And that’s all there is to setting up and using custom vibrations.

May 092012
 

It’s simple to disable message previews on iOS 5.  With iOS 5, Apple moved notification handling to a centralized place within the Settings app.  Therefore, to start, we open Settings.app, and tap on “Notifications”:

Next, select “Messages”

Then, scroll down a bit, and tap the “ON” switch next to “Show Preview”, so that when you are done it reads “OFF”

Now, when you get a text message, it will appear on your Home Screen without a preview of the message, as in the following image:

And that’s all there is to disabling message previews on iOS 5!

Apr 262012
 

One common question amongst iPhone users since the phone’s first release was “How do I change the new mail tone?” Although this somewhat natural feature was previously missing, this option is finally available, beginning with iOS 5 (available for the iPhone 3GS and higher). As we will see, users now have the option to set custom mail sent, mail received, and other notification sounds, using their choice of the iPhone’s built-in ringtones, custom ringtone files (which can include custom notification tones, of course), or custom ringtones available for purchase from the iTunes store.

To get started, open the Settings app, and tap “Sounds”

Now, after scrolling a bit, you will see the different notification sounds which you can customize. These include the New Voicemail alert, the New Mail alert, the Sent Mail alert, and more.

Selecting one of these alerts shows you the tones available to use in place of the default.

Select the sound that you would like to use, and you’re all set!

Apr 262012
 

This post will be a short one. While playing around with iMessage today, I noticed that you can send animated GIFs and they will animate within iMessages both for you and for the recipient. One item of note, however, is that the image will not animate within Photos.app, which seems to include clicking the message to show the image full-screen.

In case you are wondering what source you may use for GIFs, I’ve found that browsing to a website with animated GIFs on Safari works. Simply press-and-hold on the image, and select “Copy” from the resulting menu. Then, in Messages, tap in the text area and choose “Paste”.

Apr 262012
 

At least several people have ended up at this blog because they were searching for a way to disable iMessage. I recently warned about iMessage’s fallback to SMS, with the end-point being that such a fallback should be disabled. Some people wish to disable the use of iMessage completely. I think that disabling iMessage entirely is a bit extreme, and while I haven’t yet thought of a usage scenario to suggest that one stop using iMessage (feel free to comment below!), especially with the consideration that iMessage uses very small amounts of data and, in contrast, text messages are quite expensive, I will provide the instructions to disable it in this post.

First, load the “Settings” app on your iPhone, and select “Messages”:

Next, tap the word “On”, to the in the “iMessage” column, to move the slider from the “ON” position:

When you are done, the slider next to “iMessage” should read “OFF“, as seen below:

And that’s all! Note that to re-enable iMessage, simply slide the iMessage slider back to the “ON” position (you will need to accept the data use warning, and you may need to re-enter your Apple ID password, if you use iMessage through your Apple ID as well as phone number).

Apr 262012
 

Update:I recently blogged about disabling iMessage. To view that post, see: Disabling iMessage.

One important thing to remember when using Apple’s iMessage in the recently-released iOS 5 is that, by default, your iPhone will fallback to SMS if the iMessage service is unavailable during a conversation with another iOS 5 user. While this may not matter much if you’re chatting with another iPhone user in your country and you both have text messaging plans, if youtext message any iOS user in another country, I strongly recommend disabling this option. Why? Because if your conversation falls back to SMS, then you will be charged for that international text message by your operator, and the fees are generally quite heavy (generally about $0.25/message, depending on the operator).

In this post, I will provide an example what you will see if you drop back to SMS from iMessage, and show you how to disable this option. Note: Disabling the option to “Send As SMS” does not affect regular SMS messaging, as far as I can tell. It should only stop your iPhone from sending an SMS in place of an iMessage, in the event that the iMessage service is for some reason unreachable when you’re already in an iMessage discussion.

A message sent as an SMS after it failed to send through iMessage.

A message sent as an SMS after it failed to send through iMessage.

To disable this option, load the “Settings” app on your iPhone, and select “Messages”:

Now, tap the slider by “Send As SMS” and ensure that it is turned OFF.

NOTE: In my testing, this still does not work as well as we might expect/hope. My test message with data disabled in an iMessage conversation did not seem to send (though it did not error out, and did eventually send when data was re-enabled), however, when I closed the Messages app and reopened it, the text bar went from “iMessage” to “Text Message”, and did send a new message as a text message without any other notification. Bottom line: Still be very careful when using iMessage with someone overseas!