Jonathan

My name is Jonathan.

Feb 012016
 

I recently configured my cPanel/Exim installation to relay mail through SendGrid, using SendGrid’s official documentation and this page to supplement it.

After some tweaking, everything worked as expected, but I was left with one problem: I have scripted emails that include some large (>20 MB) attachments, and SendGrid does not support attachments of that size.

These emails are sent to a single domain, and I have no issue sending them directly, so I configured Exim (through WHM’s Service Configuration -> Exim Configuration Manager -> Advanced Editor) to send messages to that one domain without going through the SMTP relay, while keeping the relay as the default mail transport.

To do this, edit the PREROUTERS section of your Exim configuration file.  Before the relay transport block, typically “send_via_sendgrid” for SendGrid, insert the following lines:

 
to_example:
  driver = dnslookup
  domains = example.com
  transport = remote_smtp 
  no_more

You’ll want to update the router name (“to_example”) and the domain to suit your needs. It is very important to place this above the SendGrid router block, because order matters!  This code tells Exim that if the message is destined for “example.com”, that it should utilize the “remote_smtp” transport.

Any domains that don’t match this rule will continue down to the SendGrid transport code, so they will relay as expected.
Sep 292013
 

The Issue

Every now and then, a site running on WordPress will not accurately record Google AdWords visits in Google Analytics.  You may notice that the number of AdWords clicks reported in Analytics is correct, but it records nearly zero visits.  In fact, another symptom is that no Analytics campaign visits (including those campaigns defined using the Google Analytics URL Builder) are being recorded.

The Why

Google Analytics gets all of its visit data from the query string of a URL.  This is the part of the URL that follows the full path, begins with a question mark, and contains a series of parameters (or at least one parameter).  This is most visible when defining a custom campaign – it looks something like ?utm_source=newsletter&utm_medium=email&utm_campaign=promo – but, in fact, Google AdWords has been “auto-tagging” destination URLs for enhanced ad performance tracking in Analytics for quite some time.  You may have seen clues pointing to this – the Google AdWords query string parameter is GCLID.

All of the preceding information is important because it gives insight into what can go wrong with this type of tracking.  Every now and then, a WordPress plugin will issue 301 redirects for any URLs containing (unrecognized) query strings, and direct them to the same destination without those parameters.  Because the Analytics tracking code is contained within the page itself, it will only be called after the page loads from the resulting 301, and Analytics will no longer have any query string data to provide insight into the source of the visit.

The Fix

Because this is typically caused by a plugin, fixing it requires changing a plugin setting generally related to permalinks.

  • In the WordPress SEO Plugin by Yoast, the setting responsible for this is the “Clean Permalinks” option, as discussed here.  They seem to have addressed the Analytics tracking issue, while preserving the overall idea, with the advanced option “Prevent cleaning out Google Analytics Campaign Parameters”, documented here.  I have not tested this resolution, and if it does not work for AdWords tracking, then try adding the GCLID parameter to the list of “not to clean” variables.
  • In the 404 Redirected plugin, navigate to the plugin’s settings, and select the “Options” tab above.  Scroll down, and near the bottom, disable the “Force current permalinks” setting.

If you notice this happening despite the plugin settings above being correct, it is probably caused by a similar plugin with a similar setting.  To narrow it down a bit more manually, try to disable plugins until you confirm that http://www.example.com/page/?test=true (replaced with an appropriate page for your site, of course!) returns a 200 status code with the correct page contents, and not a 301 redirect to http://www.example.com/page/.

Postscript – But the “Clicks” Count is Correct in Analytics?

The avid reader and/or troubleshooter will point out that the “clicks” count is correct in Analytics, so how can this indicate a problem with Analytics tracking?  The answer is that the “Clicks” count comes directly from the Google AdWords click data (as visible in Google AdWords without Analytics even running), which is “shared” to the Analytics platform via Google’s internal data sharing settings.  The issue here is with the data being recorded by Analytics, and that would be the “visits” data.

Aug 042013
 

If you’re looking to convert many keywords to modified broad, there is an easy way to do it in Excel.  Simply create a new spreadsheet, paste the following line into cell B5, and drag the lower-right corner of that cell down as needed.  The equation is:

=IF(LEN(A5)>0,CONCATENATE(“+”,SUBSTITUTE(SUBSTITUTE(SUBSTITUTE(SUBSTITUTE(SUBSTITUTE(TRIM(A5),”+”,””),”]”,””),”[“,””),””””,””),” “, ” +”)),””)

Now, just enter the keywords you’d like to convert into cells A5 and below, and you will be good to go!

This equation removes quotation marks and square brackets, inserts a plus sign before the first word, and before every word with a space within your keyword.

You can also download a spreadsheet with the equation already loaded.  It’s good for several hundred keywords at a time.

Jul 312013
 

There may be times when links to your website can actually hurt your Google ranking.  The ideal way to resolve this problem is to contact the owner or webmaster of the offending site and request that your link be removed, or at least be updated to include the nofollow link attribute.

Obviously, this will not always be possible, so Google has an advanced feature called “Disavow Links” which allows you to, well, disavow any (exceedingly negative) links that you may wish.  You should use this tool with caution, as a misuse could relatively easily impact your web rankings in a negative way.  Used properly, however, it can restore or prevent negative impacts from unwanted sources.

Jul 282013
 

Update: Facebook now allows for retargeting directly through their Custom Audiences from Your Website feature.

In the world of Facebook retargeting ads performed through Facebook Exchange (FBX), one does not do business directly with Facebook; rather, you must use a qualified Demand-Side Partner.  I have yet to find an official list of DSPs who work with Facebook, but the list of DSPs found here is the most thorough that I have found so far.

Jul 252013
 

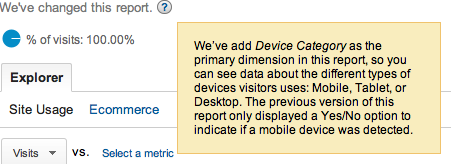
If you’ve looked at the “Audience” overview report in Google Analytics lately, you have probably noticed that the primary dimension is no longer “Mobile”, and the rows are no longer simply “Yes” and “No”.  Indeed, up near the top of the page, you can see a note from Google:

Analytics-Mobile-Update

Note from Google: “We’ve changed this report. We’ve add Device Category as the primary dimension in this report, so you can see data about the different types of devices visitors uses: Mobile, Tablet, or Desktop. The previous version of this report only displayed a Yes/No option to indicate if a mobile device was detected.”

Google’s primary idea here is to push the use of Advanced Segments to analyze traffic from various devices.  While that option is useful, sometimes it is clearer to simply see an uncluttered comparison of your mobile and non-mobile visitor behaviors – as in the previous version of this report page.

In order to emulate the old report – and, perhaps, even build upon it – we can create a basic Custom Report within Analytics.  To get started, click the “Customize” button near the top of the report page:

analytics-customize

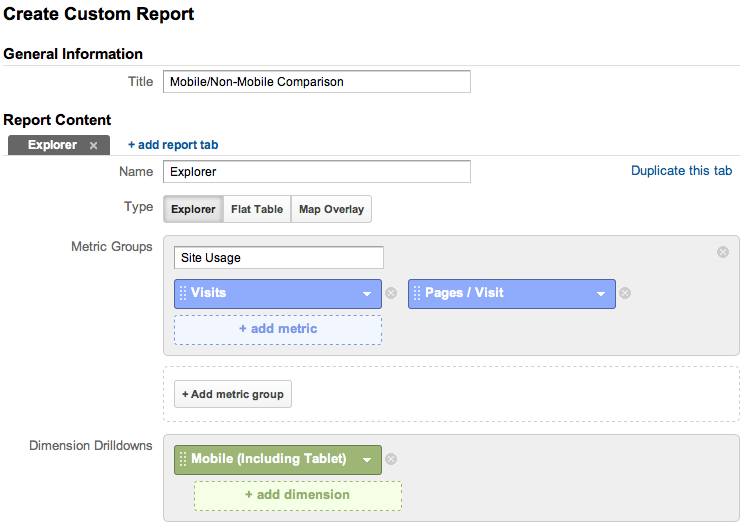
Now, give the custom report a name, like “Mobile/Non-Mobile Comparison”.  To get the essence of this report, we will remove the “Ecommerce” metric group, and set the “Site Usage” metric group to only include “Visits” and “Pages / Visit”.  The key to our report is in the “Dimension Drilldowns”.  Here, change the option to “Mobile (including Tablet)”

analytics-custom-mobile-setup

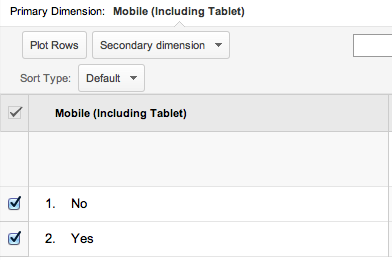
After clicking “Save”, you can now view the report, and plot those two rows, just as before:

analytics-custom-mobile-view


As far as this being even more powerful than the default mobile device report from before: note that we can set all sorts of different metrics in the custom report configuration.  This enables us to control the mobile and non-mobile data that we are comparing, and allows us to easily view the information relevant to us on a single page.

Sep 272012
 

One of the most talked about features, for better or for worse, of iOS 6 is the new Maps – Apple’s first attempt at mapping the world. If you’re a curious user who would like to use this new Apple Maps on your (OS X) computer, without the need upgrade to the latest iOS release (or even own a compatible iPhone or iPod Touch), you can do so with the latest version of Xcode and the iOS SDK, which include the iOS Simulator

First, make sure that you have the latest version of Xcode installed by checking the OS X App Store for any updates. You can also install Xcode free of charge if needed.  Next, open it and load an existing iOS app project, or create a new one.

When you’ve done this, change the setting on the top left menu to “iPhone 6.0 Simulator”, and then press the “Run” button.

After the iOS Simulator starts running, with your app running in it, you can either press the Stop button pictured above, or simply press the Home button on the simulated iPhone, and navigate to the first home screen.  Here, you will see the Maps app, to click and run.

From here, you can experience Apple’s Maps using the standard controls.  Double click for “single-finger double-tap,” and hold option and click to pinch, rotate, or double-finger double–tap.

May 132012
 

A little-known feature of iOS 5 is the ability to create custom vibrations for incoming calls.  In this tutorial, I will show you how to enable custom vibrations, create them, and assign specific vibrations on a per-user basis, in the same way you can assign custom ringtones to specific users.

Enabling Custom Vibrations

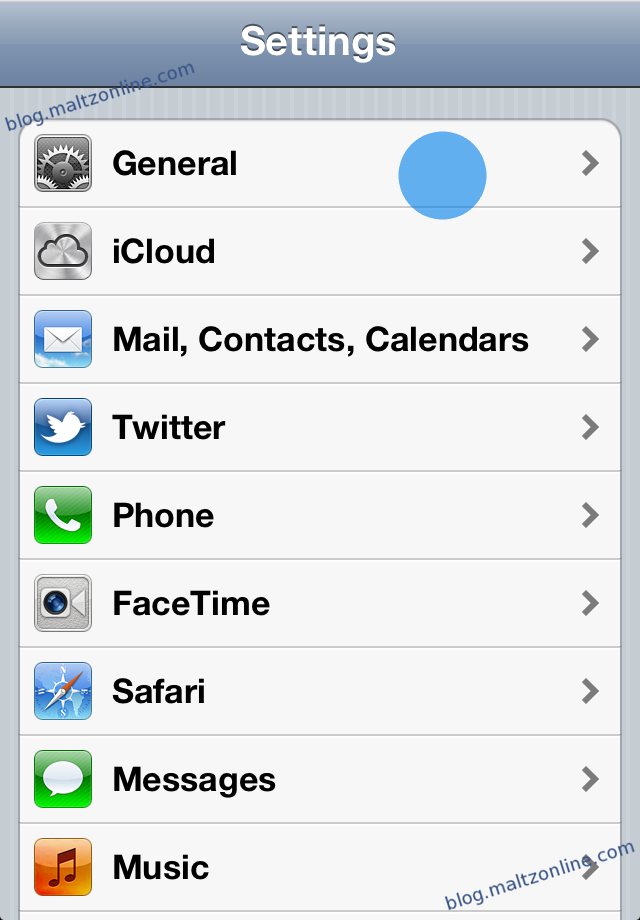
First, we must enable the “Custom Vibrations” feature. To do this, load Settings.app, and tap on “General”

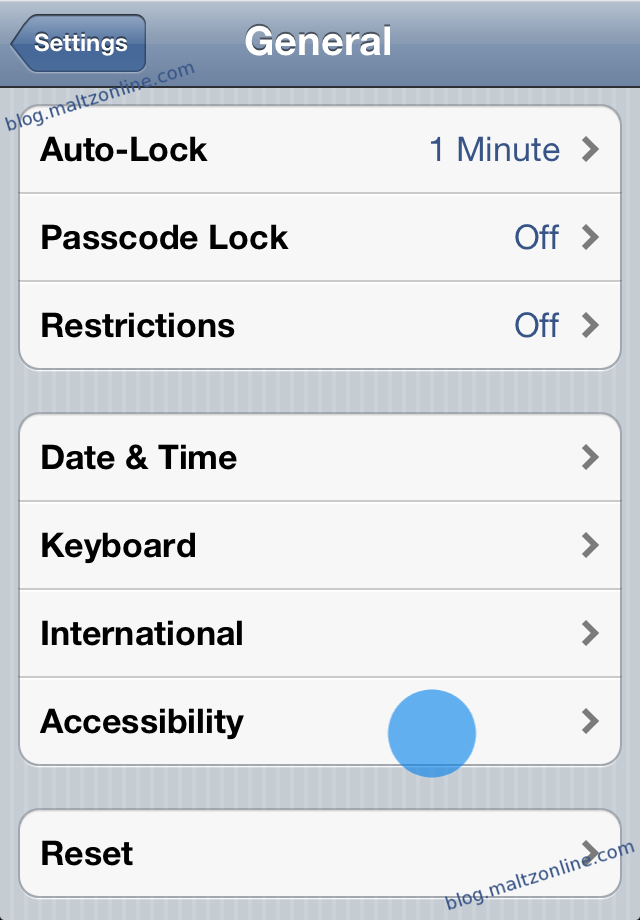
Next, scroll a bit, and tap “Accessibility”

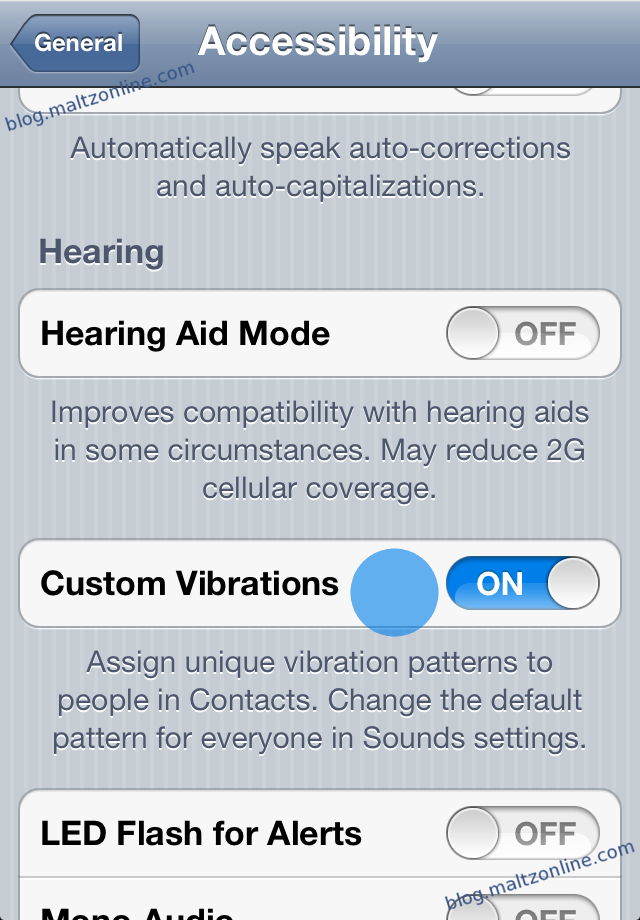
Scroll down in the Accessibility screen, and tap the slider next to “Custom Vibrations”, ensuring that it is set to “ON”

Now, we have enabled the option.

Create a Custom Vibration

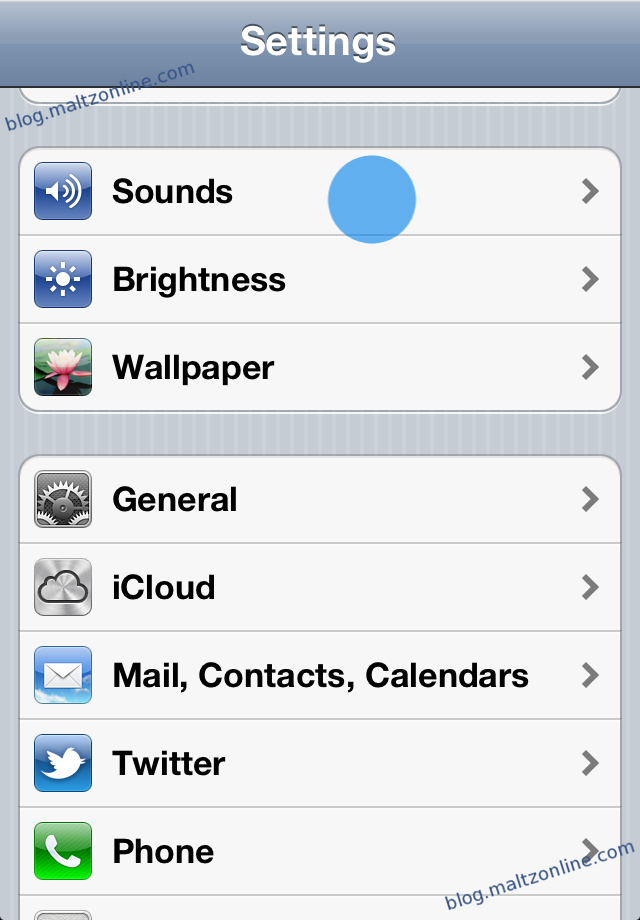
To create a custom vibration, return to the main screen in Settings.app, and tap on “Sounds”

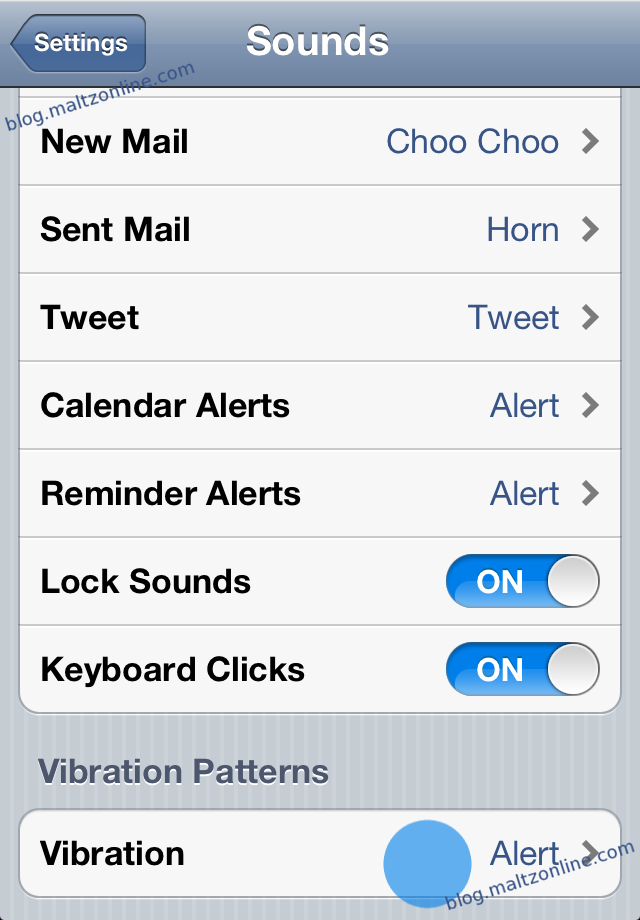
Then, scroll to the bottom to reveal a “Vibration” option

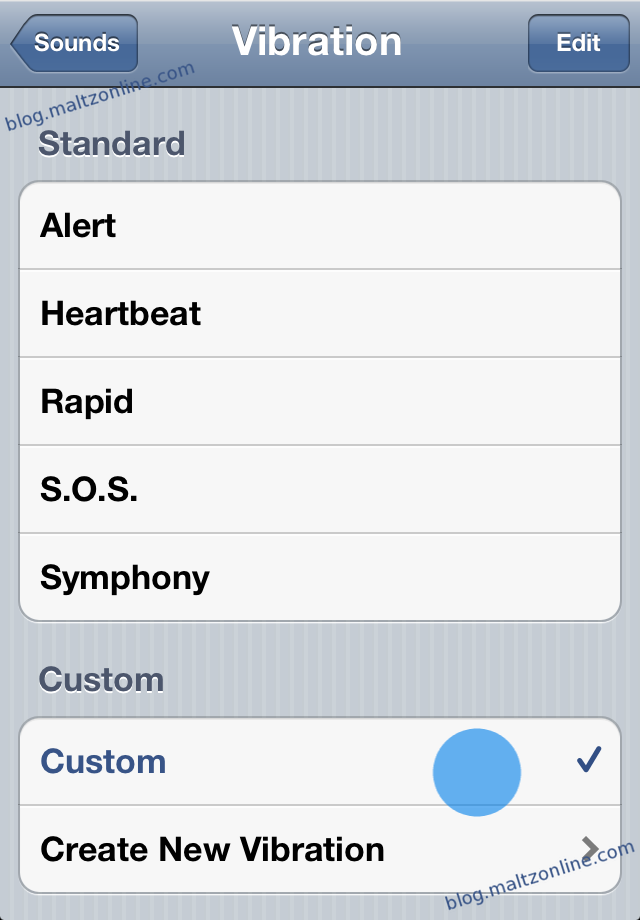
This screen presents you with an option of standard vibrate alerts to choose from, and the option to create a new one.  Tap the bottom selection to begin

As the screen suggests, tapping on your screen will enable you to simulate a vibration.  The longer you keep your finger pressed to the screen, the longer the resulting vibration lasts.  You can also lift your finger and reapply it in order to create a pattern

When you have finished, press the “Stop” button at the bottom

You may now playback the vibration, to preview how it will feel.  If you are not satisfied with it, you can tap the “Record” button to start over.  If you are satisfied, then you should tap the “Save” button on the top-right

This presents you with a prompt to enter the name which refers to this sequence.  When you have finished entering a name, tap the “Save” button

Back in the “Vibration” menu, you can now select your new vibration as the default

Note that if you’re interested in deleting a custom vibration, the typical swipe-to-delete feature works in this menu as well

Assigning a Custom Vibration on a Per-User Basis

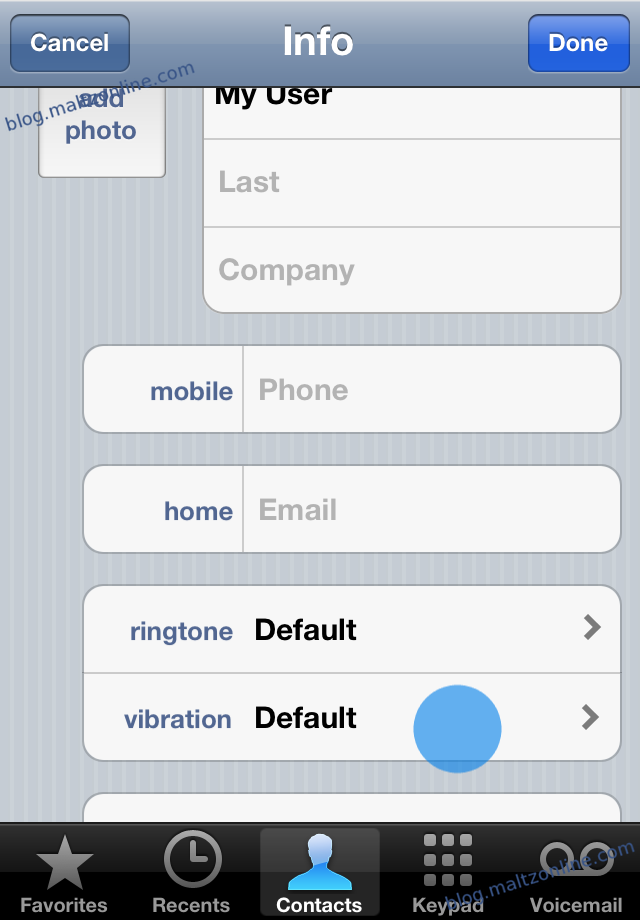
To assign a specific vibration to a user, open that user’s entry in the Address Book or Phone app, and tap the edit button

Then, scroll a bit, and tap on “Vibration”


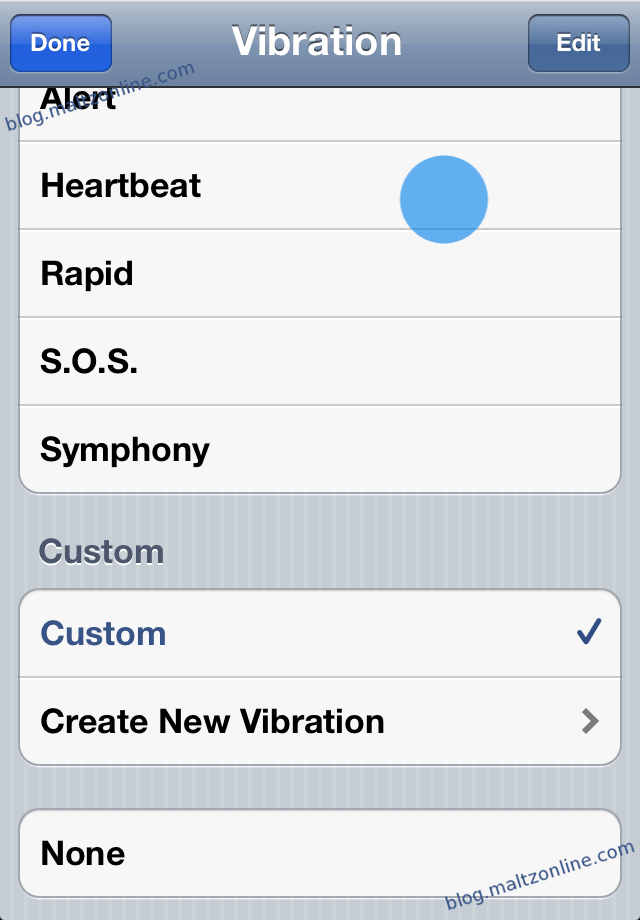
And in the resulting menu, set the vibration to your choosing (the default option will be the option selected above)

And that’s all there is to setting up and using custom vibrations.

May 092012
 

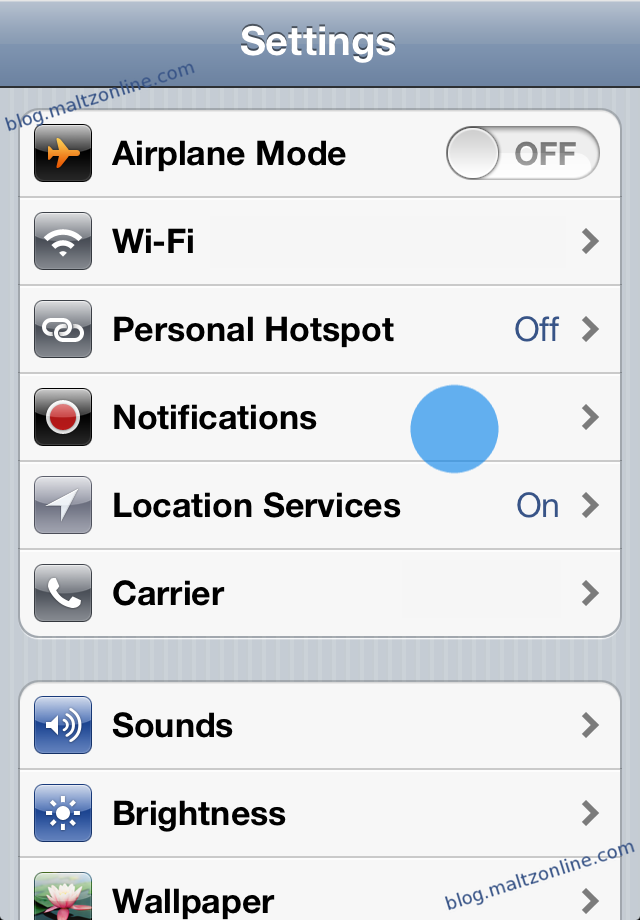
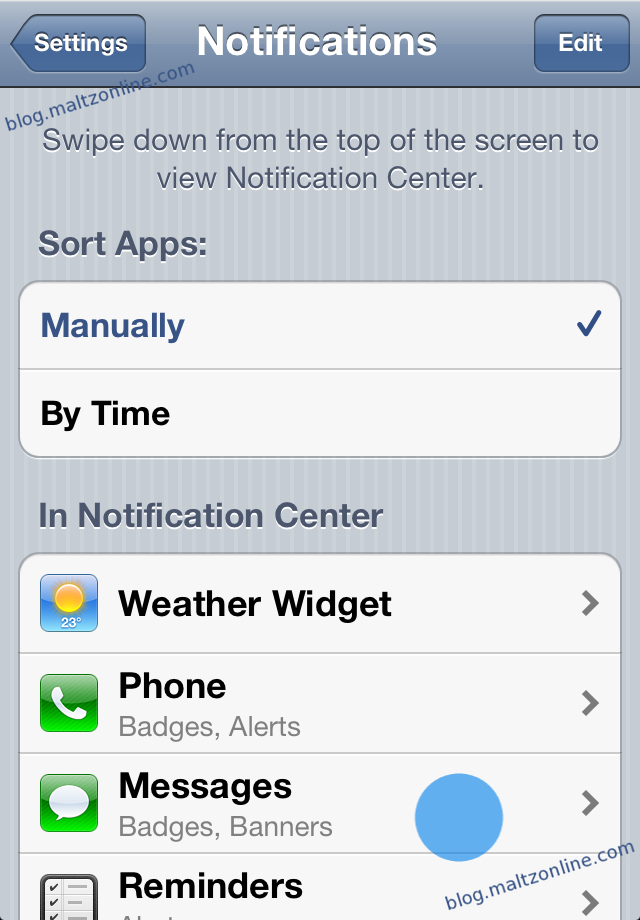
It’s simple to disable message previews on iOS 5.  With iOS 5, Apple moved notification handling to a centralized place within the Settings app.  Therefore, to start, we open Settings.app, and tap on “Notifications”:

Next, select “Messages”

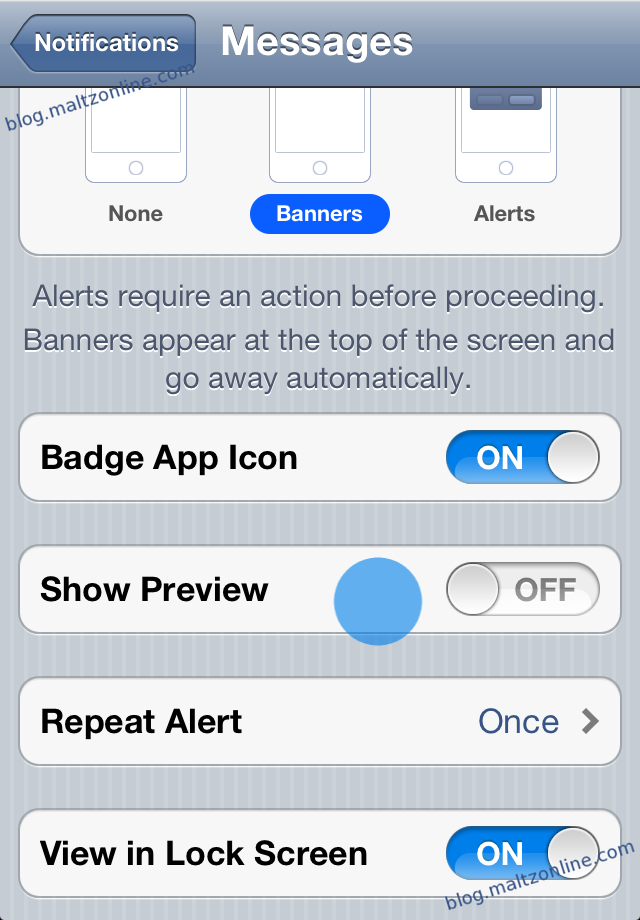
Then, scroll down a bit, and tap the “ON” switch next to “Show Preview”, so that when you are done it reads “OFF”

Now, when you get a text message, it will appear on your Home Screen without a preview of the message, as in the following image:

And that’s all there is to disabling message previews on iOS 5!

Apr 292012
 

Exporting data from WordPress in “WordPress format” (WXR) allows you to locally save an XML file with your blog’s data.  Upon trying to import that file, from “Tools” -> “Import” -> “WordPress” menu option, however, you are currently prompted for FTP server info during the plugin’s installation.  If you would like to upload the XML file directly, without an FTP server in the middle, the solution is to be found here, namely:

  • Browse to the WordPress Importer plugin manually.
  • Save the ZIP file.
  • Unzip its contents to the wp-content/plugins directory within your WordPress installation.

After ensuring that your permissions are correct (which is to say, they probably shouldn’t deviate too drastically from the permissions on your other WordPress files), browse over to “Tools” -> “Import” -> “WordPress” again, and you should see a prompt to upload your file and continue.  From there, you should be set!